
Vytvorte si 3D písmo pomocou programu Gimp - ako to funguje
S programom Gimp môžete dať svojim písmom elegantný 3D efekt. Ukážeme vám, ako to urobiť pomocou nástroja na úpravu obrázkov.
Gimp: Vytvorte 3D písmo v 10 krokoch
Či už ide o pozvánky, letáky alebo vaše vlastné webové stránky - 3D text je skvelý nástroj, ktorý zaujme takmer všade. Zložité kroky pokynov s programom Gimp môžete znova pochopiť v našej fotogalérii.
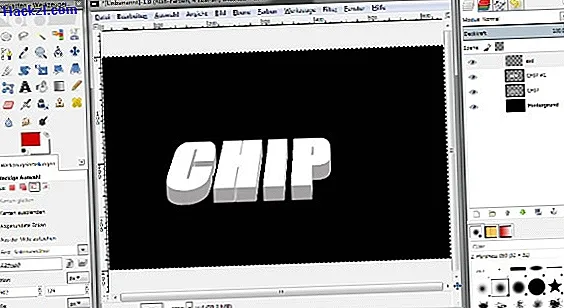
- Otvorte novú oblasť kreslenia v aplikácii Gimp a pomocou textového nástroja zadajte požadované písmo. Najlepšie je použiť svetlé písmo na tmavom pozadí.
- Potom vyberte nástroj Perspektíva a trochu nakloňte text späť. Akonáhle sa vám výsledok páči, kliknite na „Transformovať“.
- Pravým tlačidlom myši kliknite na textovú vrstvu a vyhľadajte položku „Duplikovať vrstvu“. Kliknutím na ikonu oka na novej vrstve ju skryjete.
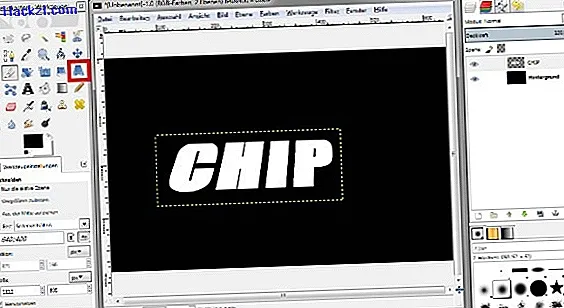
- Teraz je to späť na pôvodnú úroveň textu: Pravým tlačidlom myši kliknite na položku a vyberte možnosť „Výber z alfa kanála“.
- Teraz dajte text mierne tmavšiu farbu. Môžete to urobiť buď pomocou nástroja na vyplnenie alebo pomocou „Farby“> „Zafarbiť“.
- Potom výber znova zrušte pomocou „Výber“> „Nič“.
- Opäť kliknite pravým tlačidlom myši na textovú vrstvu a vyberte možnosť „Vrstva na veľkosť obrázka“.
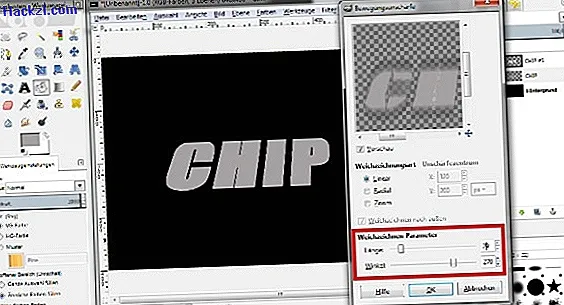
- V časti „Filtre“> „Rozostrenie“ vyberte položku „Rozmazanie pohybu“. Nastavte posúvač na „Dĺžka“ na „27“ a na „Uhol“ na „270“. Potom kliknite na „OK“.
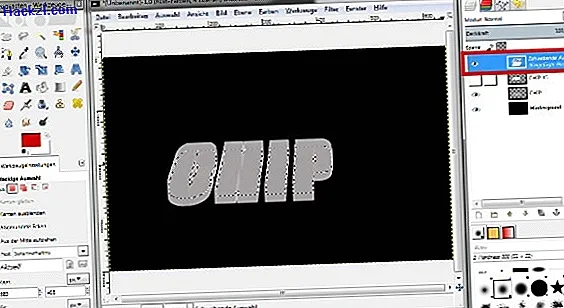
- Teraz skopírujte textovú vrstvu do schránky pomocou kombinácie klávesov [Ctrl] + [C]. Potom stlačením kombinácie klávesov [Ctrl] + [V] 30 až 40 krát vrstvu znova vložte. Písmo by malo pomaly nadobúdať 3D efekt.
- Nakoniec aktivujte symbol oka na predtým skrytej vrstve. 3D efekt je teraz dokončený.
Jednoznačne vám ukážeme všetky kroky v našej fotogalérii.
Najnovšie videá
Pomocou nástroja pre perspektívu môžete text nakloniť dozadu. Hrajte sa s nastaveniami tu, kým nebudete spokojní s perspektívou.
Po duplikovaní a zafarbení textovej vrstvy použite filter Rozmazanie pohybu. Tu sú dôležité správne hodnoty dĺžky a uhla.
Potom vrstvu duplikujte až 40-krát. Najrýchlejším spôsobom je použitie kombinácie klávesov [Ctrl] + [C] a potom [Ctrl] + [V]. Čím viac vložíte vrstvu, tým lepšie by mal vyzerať 3D efekt.
Nakoniec znova ukážte kópiu prvej vrstvy. Váš 3D text je teraz pripravený a môžete ho uložiť alebo skopírovať na iný obrázok.
