
Nainštalujte Ubuntu na Wii - takto:
„Ako skutočne inštalujete Ubuntu na Wii?“ - Najneskôr odvtedy, čo Nintendo prerušila podporu pre Nintendo Wii s vydaním Wii U, stále viac a viac majiteľov Wii zaujíma, ako by sa Wii mohlo použiť iným spôsobom. V tomto praktickom tipe vám ukážeme, ako zmeniť váš Nintendo Wii na rýchle Linuxové PC.
Použite Ubuntu na Wii: Potrebujete toto príslušenstvo
Aby ste mohli používať Ubuntu na Wii, potrebujete nasledujúce príslušenstvo.
- Klávesnica USB.
- USB kľúč s najmenej 4 GB úložného priestoru.
- Karta SD (alebo karta MicroSD s adaptérom) s najmenej 4 GB úložného priestoru.
Ubuntu pre Wii: prípravy
Pred inštaláciou Ubuntu na Wii musíte vykonať nejakú prípravu.
- Spustite zariadenie Wii a v ľavom dolnom rohu prejdite na položku Možnosti Wii.
- Potom kliknite na cestu do časti „Nastavenia Wii“.
- Potom vpravo hore napíšte číslo verzie. V našom prípade je to „4.3E“.
- Potom prejdite na jednu stránku a kliknite na „Internet“.
- Potom vyberte „Informácie o konzole“ a zapíšte si adresu Mac vášho zariadenia Wii.
- Skontrolujte tiež, či je váš Wii pripojený k internetu prostredníctvom WiFi. Potom môžete svoj Wii vypnúť.
Nintendo Wii: LetterBomb
Ďalej si musíte stiahnuť LetterBomb pre Wii.
- Prejdite na domovskú stránku LetterBomb a vyberte verziu svojho operačného systému tu.
- Potom zadajte svoju adresu Mac a začiarknite políčko „Zostavte si HackMii Installer pre mňa!“.
- Nakoniec kliknite na „Vystrihnúť červený vodič“. Potom sa stiahne súbor ZIP.
- Rozbaľte tento súbor ZIP a ako cieľový priečinok vyberte kartu SD. Mali ste ich predtým naformátovať pomocou FAT32.
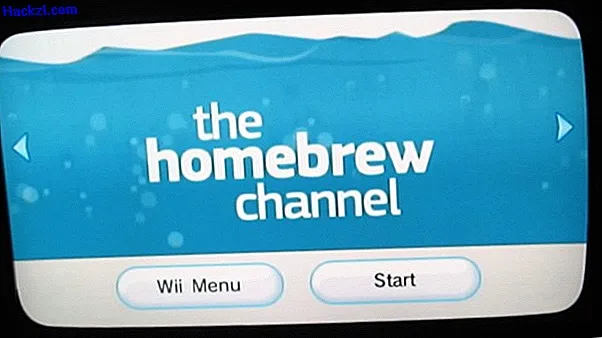
Nainštalujte homebrew kanál na Wii
Potom vložte kartu SD do Wii a spustite ju.
- Vpravo dole by ste mali vidieť novú správu v doručenej pošte s červenou obálkou.
- Kliknite na obálku s tlačidlom A na vašom Wiimote.
- Potom stlačte tlačidlo „1“ na diaľkovom ovládači Wii.
- Pomocou klávesov so šípkami (na vašom Wiimote) prejdite na „Pokračovať“ a stlačte „A“.
- Potom prejdite na „Inštalácia homebrejského kanála“ a na „Áno, pokračujte“. Potom je nainštalovaný homebrew kanál.
- Potom znova kliknite na „Pokračovať“ a na „Ukončiť“.
- Teraz by sa mal začať domáci kanál. Stlačte tlačidlo domov na diaľkovom ovládači Wii a kliknite na „Exit to System Menu“. Potom môžete svoj Wii vypnúť.
Ubuntu pre Wii: Potrebujete tieto súbory
Ďalším krokom je nájsť správne súbory pre vašu inštaláciu Ubuntu.
- Najprv potrebujete inštalačný program, ktorý dokáže nainštalovať jadro systému Linux. Teraz používame „Whiite Linux Installer (Beta 1)“, ktorý si môžete stiahnuť z domovskej stránky systému GameCube Linux.
- Rozbaľte tento inštalátor a ako cieľovú cestu vyberte svoju SD kartu. Je dôležité, aby ste ich vopred preformátovali pomocou FAT32.
- Ďalej potrebujete vhodnú distribúciu. V tomto článku uvádzame zoznam našich 10 najlepších. Stránka na stiahnutie systému GC Linux a domovská stránka WiiBrew sú veľmi praktické. Momentálne používame distribúciu Ubuntu pre Wii.
- Tento súbor tiež rozbaľte a ako cieľovú cestu vyberte disk USB. Tiež by to malo byť úplne prázdne a znova naformátované pomocou FAT32.
Nainštalujte Ubuntu na Wii
Po dokončení všetkých vyššie uvedených krokov môžete teraz nainštalovať Ubuntu na Wii.
- Vložte svoju SD kartu, USB kľúč a USB klávesnicu do vášho Wii a spustite ju.
- Potom otvorte homebrew kanál, kliknite na „whiite-linux Installer (B1)“ a na „Load“.
- Potom pomocou klávesov so šípkami na klávesnici prejdite na „Áno“ a stlačte kláves Enter.
- Potom sa znova vráťte na „Áno“, „OK“ a „Áno“. Ubuntu bude teraz nainštalovaný. Tento proces trvá asi dve hodiny. Po krátkej dobe sa aktivuje šetrič obrazovky a obrazovka zhasne. Obrazovku aktivujete jednoduchým stlačením klávesu Enter.
- Keď sa zobrazí správa, že Ubuntu bola úspešne nainštalovaná, stlačením klávesu Enter znova reštartujte počítač Wii.
Spustite Ubuntu na Wii
Po dokončení inštalácie môžete spustiť Ubuntu.
- Na tento účel otvorte homebrew kanál, kliknite na „Ubuntu Wii“ a na „Načítať“. Potom sa Ubuntu topánky.
- Pomocou tlačidla A na vašom Wiimote kliknete ľavým tlačidlom myši a tlačidlom B pravým tlačidlom myši.
- Tip: Ak by ste chceli tiež surfovať po internete pomocou Ubuntu, musíte najprv spustiť konfiguračný nástroj WLAN pomocou príkazu „sudo ~ / whiite-ez-wifi-config“ (bez úvodzoviek).

Vo videu: Ubuntu pre smartfón.
Nasledujúci praktický tip vám povie, ako nainštalovať linuxovú distribúciu Fedora do VirtualBoxu.