
Ubuntu: Zobraziť nainštalovaný hardvér - ako to funguje
V tomto článku vám ukážeme, ako zobraziť nainštalovaný hardvér v Ubuntu. Existuje niekoľko možností, ktoré sa vo všeobecnosti líšia iba svojím rozsahom. Vyberte metódu, ktorá najlepšie vyhovuje vášmu účelu.
Metóda 1: najdôležitejšie informácie
Niekedy potrebujete iba názov procesora alebo veľkosť pevného disku. V takom prípade stačí položka ponuky „Podrobnosti“ na ovládacom paneli.
- Prejdite na ovládací panel Ubuntu.
- Teraz vyberte "Detaily" v "Systém". Tento bod je zvyčajne v dolnej lište.
- Tu sú zobrazené najdôležitejšie komponenty.

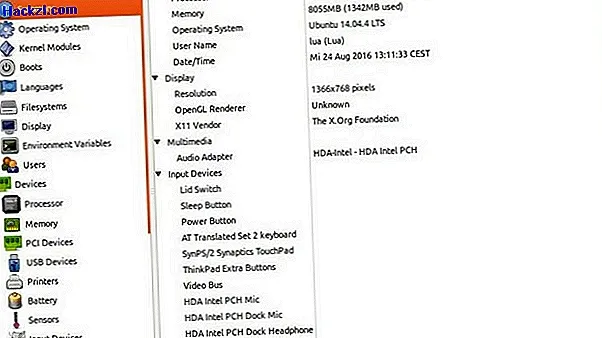
Metóda 2: Viac podrobností pomocou používateľského rozhrania
Ak chcete zobraziť ďalšie podrobnosti o svojich komponentoch v usporiadanom rozhraní, musíte nainštalovať ďalší softvér. Postupujte nasledovne.
- Otvorte terminál (Ctrl + Alt + T).
- Zadajte nasledujúci príkaz a stlačte kláves Enter.
- sudo apt-get install hardinfo
- Po inštalácii otvorte program zadaním „hardinfo“ (bez úvodzoviek) do programového riadku a potom stlačte kláves Enter.
- Teraz máte úplný prehľad o nainštalovaných komponentoch.
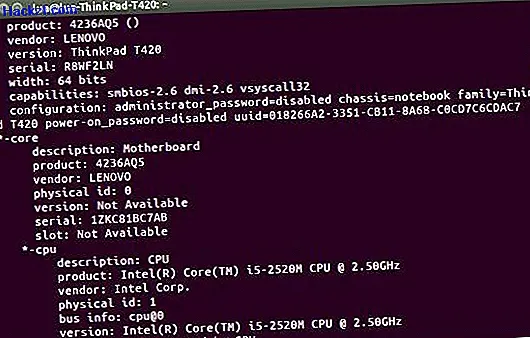
Metóda 3: Viac podrobností bez používateľského rozhrania
Ak ste oboznámení s hardvérom a terminál používate často, môžete vykonať aj nasledujúce kroky.
- Otvorte terminál.
- Zadajte nasledujúci príkaz a potom stlačte kláves Enter.
- sudo lshw
- Terminál teraz vydá kompletný zoznam vašich komponentov.
V nasledujúcom praktickom tipe vám ukážeme 10 najlepších príkazov pre Ubuntu.